Implementing Navegg’s technology is quite simple and it’s done by adding a one line JavaScript code to the website’s HTML. We advise that this should be done by someone with technical knowledge. Below you’ll find 2 options of how to implement the JavaScript tag:
Direct in the HTML
The following JavaScript tag must be placed on every page of the website:
<script id="navegg" src="//tag.navdmp.com/tmID.js" type="text/javascript"></script>
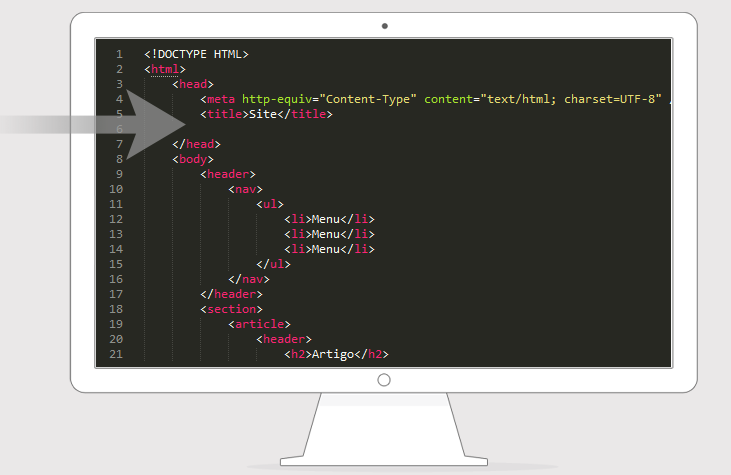
The ID parameter must be changed to the account’s ID number, which is informed by Navegg in the beginning of the setup process. Preferably, the tag should be inserted in the <head>, as shown in the image below.
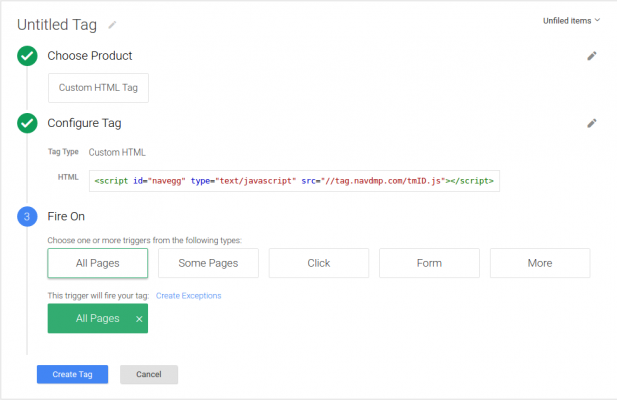
Via Google Tag Manager
- Log in and go to the “Overview“;
- In the “New Tag” box, click “Add a new Tag“;
- In the “Choose Product” step, select the “Custom HTML Tag” option;
- In the “Configure Tag” step, enter the code of the Navegg’s Tag, remembering to replace the ID for your account ID in Navegg’s;
- In the “Fire On” step, select in which pages you want to fire Navegg’s Tag, usually the indicated option is “All Pages“;
- Save the settings by clicking “Create Tag“. The first data report will be showed in your Navegg’s panel within 48 hours after publishing the tag.